
I wanted a multi bottle washer to make bottling day go faster than with my duel washer that I already use. I started by taking a couple empty bottles into Lowes (got several looks though....including a nod of approval from a fellow homebrewer) to find a solution that would be cheap, not include soldering and me modular to change the design and amount of bottles I could do at a time.
I found that 1/2" CPVC fits into the neck....barely, but it fits....and that the elbows/"t" do not. also, copper 1/2" caps fit over the CPVC as well as inside the neck of most bottles (the only ones I have not found to fit so far are Hoegarden bottles).
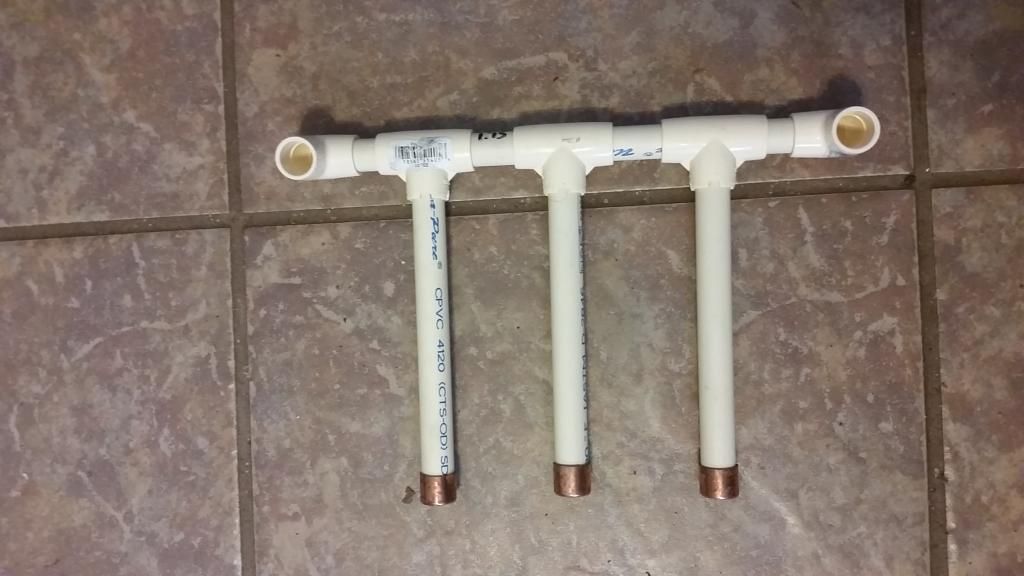
Then the design... I was hoping to do a full case of bottles at a time, but due to the only tub I had at the house at the time, I would only be able to do 12-16 bottles. I just started drafting up different lengths to figure out which could accommodate both regular and shorty style bottles in sketchup (already had a couple of models for both shorty and regular bottles, and downloaded a couple of models for the connections) This is what I came up with.
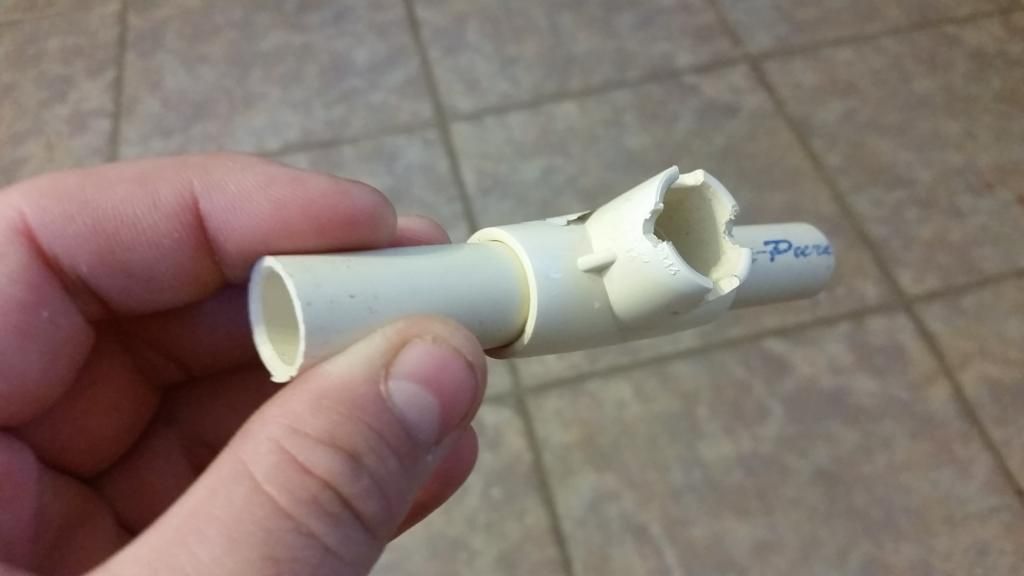
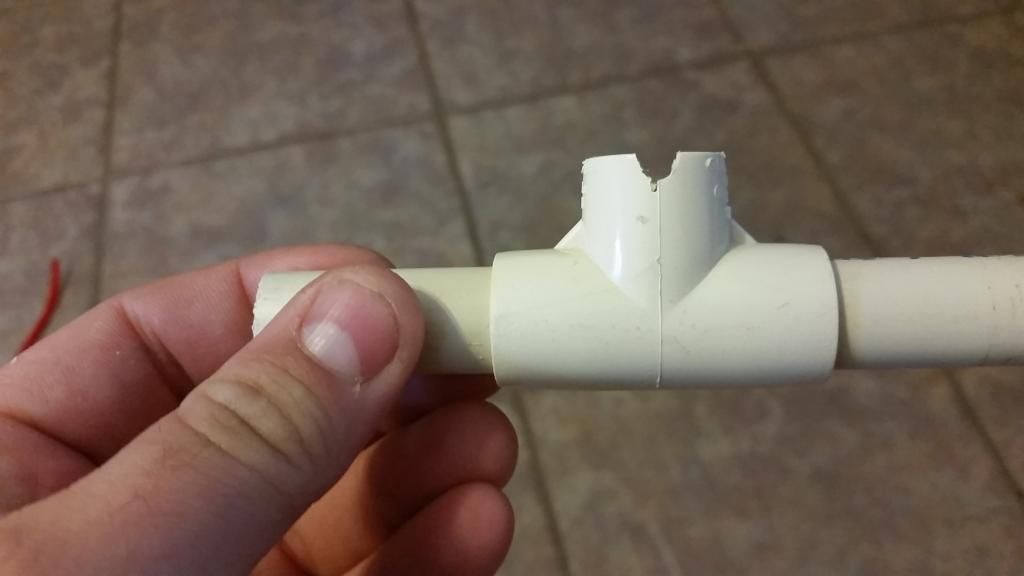
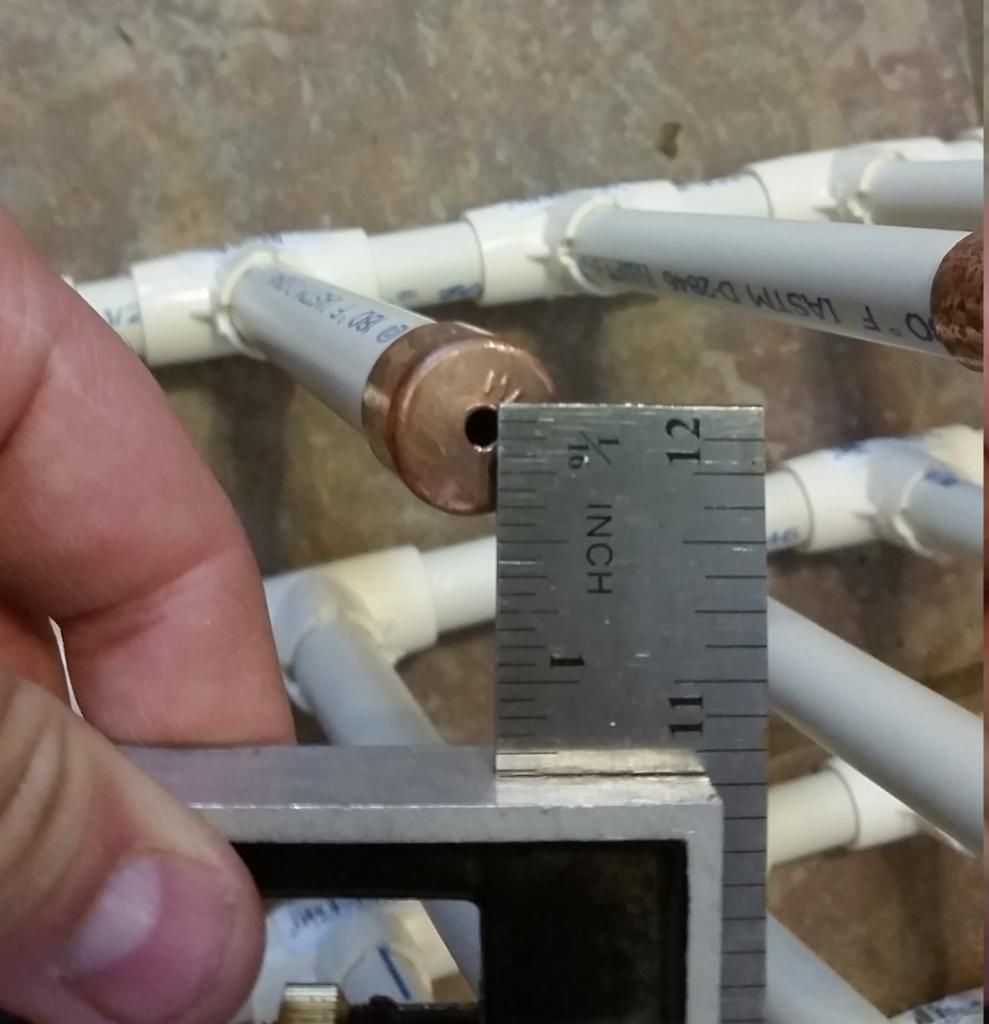
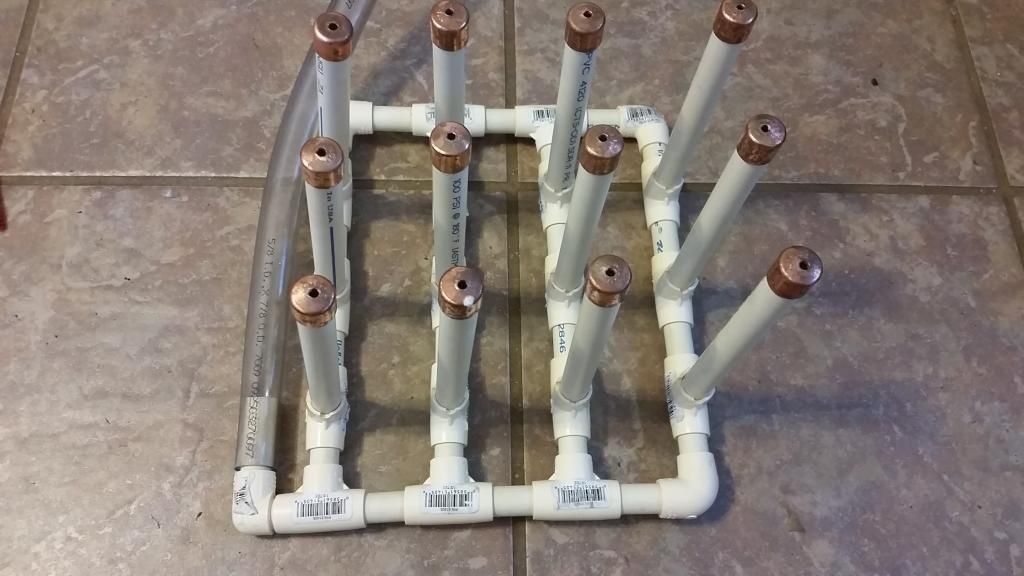
First practical assembly was actually perfect. The length of the connectors in between the "t"s are 1 13/16" long, the shorter ones are 1 5/16", and the risers are 6". I did not glue any of the connecters together as to keep it able to be taken apart for storage and for being modular. the only ones I glued in were the risers and caps. Before glueing the risers into the T's I used a rat tail file to create some voids about .25" deep in the top in order to allow a channel for water to flow out of the bottle. then use a punch and simple the inside of the copper cap and drill out a small hole. The size may vary depending on the pressure your pump can generate, but in my case I used a 1/8" hole.
For a 12 bottle washer, you will need at least:
12 - 6" risers
12 - copper caps
14 - 1 13/16"
9 - 1 5/16"
17 - t's
3 - 90 deg elbows
1 - street 90 deg elbow
for assembly, just start loose fitting the components in a 3 riser setup. Make 1 with 2 elbows on the end with the 1 5/16" piece between the elbow and the first and last t's. Make one with an elbow and a T at the ends. And make 2 with both T's at the end.
Once all four sections are assembled, connect them together with 1 13/16" pieces. Use a rubber mallet or just some firm elbow grease and push everything together to tighten the connections.
use the last 1 5/16" piece and the street 90 deg elbow to create the attachment for the hose leading to the pump.
As for pumps, I use a pacific hydrostar 620GPH that I picked up at harbor freight for around $35. I use this pump also to circulate ice water for my stainless steel IC, I just have to change out the connectors.
for my setup, it takes exactly 5 gallons of water, pbw solution, or star san to cover the pump. which works out great, as all i do is use my kettle to heat up the water/pbw and dump it in. I usually run it for about 2-3 minutes for each load till 2 cases are done on each solution and then transfer to my dishwasher to rinse/clean/sanitize the outside of the bottles. All in all, this has cit bottling prep day down to around 16-20 minutes of mostly hands off work.
Washer at work
[ame="https://www.youtube.com/watch?v=G7_VvXr01As&list=UUr0RfUiUigoNnatDyTKTx2A"][YOUTUBE]G7_VvXr01As&list=UUr0RfUiUigoNnatDyTKTx2A[/YOUTUBE][/ame]
I found that 1/2" CPVC fits into the neck....barely, but it fits....and that the elbows/"t" do not. also, copper 1/2" caps fit over the CPVC as well as inside the neck of most bottles (the only ones I have not found to fit so far are Hoegarden bottles).
Then the design... I was hoping to do a full case of bottles at a time, but due to the only tub I had at the house at the time, I would only be able to do 12-16 bottles. I just started drafting up different lengths to figure out which could accommodate both regular and shorty style bottles in sketchup (already had a couple of models for both shorty and regular bottles, and downloaded a couple of models for the connections) This is what I came up with.
First practical assembly was actually perfect. The length of the connectors in between the "t"s are 1 13/16" long, the shorter ones are 1 5/16", and the risers are 6". I did not glue any of the connecters together as to keep it able to be taken apart for storage and for being modular. the only ones I glued in were the risers and caps. Before glueing the risers into the T's I used a rat tail file to create some voids about .25" deep in the top in order to allow a channel for water to flow out of the bottle. then use a punch and simple the inside of the copper cap and drill out a small hole. The size may vary depending on the pressure your pump can generate, but in my case I used a 1/8" hole.
For a 12 bottle washer, you will need at least:
12 - 6" risers
12 - copper caps
14 - 1 13/16"
9 - 1 5/16"
17 - t's
3 - 90 deg elbows
1 - street 90 deg elbow
for assembly, just start loose fitting the components in a 3 riser setup. Make 1 with 2 elbows on the end with the 1 5/16" piece between the elbow and the first and last t's. Make one with an elbow and a T at the ends. And make 2 with both T's at the end.
Once all four sections are assembled, connect them together with 1 13/16" pieces. Use a rubber mallet or just some firm elbow grease and push everything together to tighten the connections.
use the last 1 5/16" piece and the street 90 deg elbow to create the attachment for the hose leading to the pump.
As for pumps, I use a pacific hydrostar 620GPH that I picked up at harbor freight for around $35. I use this pump also to circulate ice water for my stainless steel IC, I just have to change out the connectors.
for my setup, it takes exactly 5 gallons of water, pbw solution, or star san to cover the pump. which works out great, as all i do is use my kettle to heat up the water/pbw and dump it in. I usually run it for about 2-3 minutes for each load till 2 cases are done on each solution and then transfer to my dishwasher to rinse/clean/sanitize the outside of the bottles. All in all, this has cit bottling prep day down to around 16-20 minutes of mostly hands off work.
Washer at work
[ame="https://www.youtube.com/watch?v=G7_VvXr01As&list=UUr0RfUiUigoNnatDyTKTx2A"][YOUTUBE]G7_VvXr01As&list=UUr0RfUiUigoNnatDyTKTx2A[/YOUTUBE][/ame]
